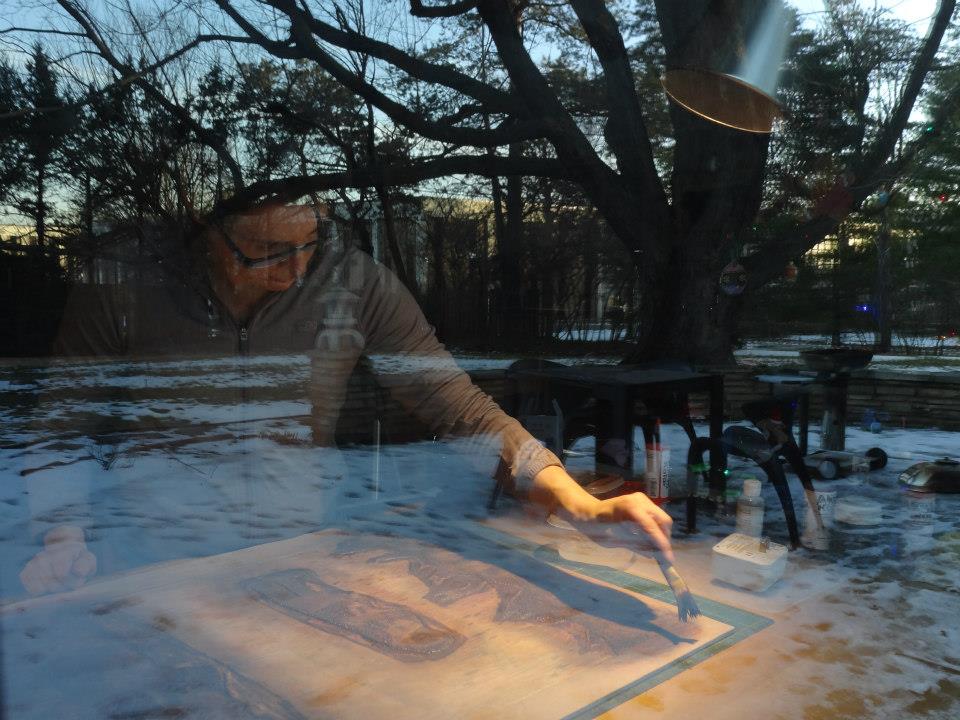
Mike Lyon has a three story custom built playhouse and the energy, imagination and enthusiasm of a child let loose to explore endless possibilities. He is a dedicated artist first, a superb craftsman, whose furniture creations are much in evidence, an inventor and computer wizard. Moving through his building one is struck by the multitude of ingenious equipment that he designed and built. He skillfully re-purposed building materials from a dismantled school building for floors, walls, shelves and cabinets.


The first level space of the studio building is dominated by a 4 by 8 foot stationary press and its accompanying self-designed sliding humidor drawer. This is a paper delivery system for his large-scale wood block prints. Nearby is the giant router bed where the blocks, 13 to 30 per print, are cut according to Mike's computer programmed instructions. A large multi-machine equipped wood shop is next door and then upstairs to a broad window walled gallery and studio space. The sound of churning and whirring, like a giant washing machine, comes from the ingenious device he created to produce little squirts of ink onto enormous heavy, absorbent paper, which is vacuum-adhered to a table. As the suspended pen moves about over the paper it charts out the instructions that Mike codes into the computer that directs each tiny movement. The result, after several weeks, is an immense drawing that reveals itself upon close inspection to be visually fascinating and quite unique. Though the process is reproducible, Mike chooses to make only one of each drawing.

Mike has developed and applies industrial techniques that have no actual commercial application, just to create what he imagines. In a candid moment he said, "Sometimes I wonder who would do something like this!" Apparently, no one but him. His approach to woodblock printmaking, though inspired by the Japanese tradition, is otherwise revolutionary and charts a new path. One similarity: the famous Japanese woodcut artists painted their images, which were then glued onto and cut into the blocks by craftsmen. A router executes Mike's woodcuts, but the images he captures with photos must be translated by him into code before the machines can do anything. To Mike, the actual printing is the least engaging part of the process. It is the weeks of devising algorithms and programming that challenge him. And the unique marks that result are the eye candy that feeds his habit and are the viewer's reward for getting up close. Due to the large scale of the images, that experience is much like looking at an old master etching through a magnifying glass.


Mike had a great deal to say about his work, which he appreciates being understood on the artist's terms. It is radically different from digital print production (inkjet on high-quality paper). He merited a chapter in the new book, Post-Digital Printmaking that explains this contemporary practice, incorporating the strengths of both digital and traditional, resulting in hybrid printmaking techniques. This is now an important current in the printmaking of our time.
~~~~~ mike lyon studio review by print society member Catherine Vesce ~~~~~~
Mike on LINE MAKING. Watch 2 minute video.
"...you can see time ripples kind of growing out from that.
So I am pretty fascinated by my own stuff. Obviously I wouldn't
do it if I weren't interested in doing it. It's a lot of time every
day down here thinking up how to make images. These are all
sort of experiments in cross hatching, which seem so simple.
In fifth grade, my friend Joe Kramer taught me how to cross
hatch, we were cross hatching those first space capsules
they were shooting up. And so we drew those conical
shapes, he showed me how that side of the pencil or pen
to make lots of lines (he makes sideways motions with his
hand). You know, I drew like that through art school and
after with lots of line (moving his hand in the air) to make
tone. And never thought too much about it. But when you
are instructing a machine where to move one-thousandth
of an inch at a time, then it becomes more, you can not just,
there is no command, at least not on my machine, that says
"go like this" (his hand doing the vigorous sideways motion
in the air). (laughter) Most of these drawings are made
following a kind of plan that takes the contours kind like a
woodblock print, and grow out of the wood block printmaking,
take the contour and step in this set distance and trace the
contours. So that in a real weird way the direction of the line
follows the direction of the contrasty parts of the drawing.
So the lines of the eyebrows follow the hairs of the eyebrow.
The lines for the glasses (his hand points to the glass
frames on the large print) and then, in a wacky kind
of way, the lines of her skin also follow the lines of the
glasses for a while, and then they start echoing the lines
of other features of the face."
(Photo by Catherine Vesce)
Mike stood by the large bed of the ink drawing machine that he built. The arm was moving and depositing white ink on specific portions of the orange image below it. Next is a segment about the pen on the arm and after that a segment about the solenoids he used in its creation.
"The pen (on the suspended arm) is not held down by anything when it's drawing, it is just the weight of two nuts. There is no downward pressure other than gravity. By trial and error I decided how much load to put on the pen. I have TORN UP lots of drawings in the process of finding out what works best. Initially I held the pen in the machine, because the machine has an axis that moves up and down. This bed is supposedly flat. I would lower the pen down until it just touched the paper, and then draw. The table is never quite flat, so the drawings would be dark in some areas and pale in others. So then, I loaded the pen up and put a little bit of sponge against the top, so when I pushed down on it I never really hit on it--- I never really finish a sentence, do I ?--- So that didn't work very well either, the foam that was supposed to put pressure on never did get it right. "
(Photo by John Mallery)
"I finally bit the bullet, because it requires, so these wires (he points to the arm that holds the ink) are three lines. I can control three solenoids. Only because that is all the wire pairs I had and the wire I had, otherwise I could have controlled more. So, I built a circuit to hook up to the machine, which is in the box. There is a control box under here, that the computer talks to. And there is the circuit board I built in there, just simple relays that in a de-bouncing circuit that takes the 24 volts that the control box runs on. I spent a week to ten days learning about solenoids. Reading the catalogs, deciphering these charts, and learning, after I almost burned the studio down, with a solenoid that was designed for door opening (back and forth motion with his fingers). You know, you say into the door panel, "Madeline, it's me," and that loud buzzing sound and click that releases the locked door, so you can enter the building. It was THAT kind of solenoid. They are not continuous duty solenoids. They are ten to fifteen percent duty. They are not made to be on all the time, but I did not know that. So the first one of these I made was a 110 volt solenoid that lifted the pen up and down and worked great. I went home at night. When I came in the morning the whole studio was filled with black snowflakes, and my solenoid had MELTED down onto the drawing. So that was when I started studying solenoids, and learned there is a continuous duty and a partial cycle, 24 volts, six volts, five volts. The manufacturers give you graphs, that tell you all the you need to know. Like, how much weight it will lift, how far, how fast, how the contact points meet. This solenoid (pointing to the inking arm in motion) is rated for half a million cycles. This drawing has more than that. It will probably have one hundred thousand cycles alone. I don't know how many million actuations. You hear the CLICK? That lifts the pen, moves the arm to the next location, drops it down, and it draws whatever it is supposed to be drawing."
ShopBot (CNC) computerized numerical control
More on solenoids here http://mechatronics.mech.northwestern.edu/design_ref/actuators/solenoids.html A solenoid is a device which converts energy into linear motion. http://www.wisegeek.com/what-is-a-solenoid.htm
Mike talked about nineteen different line thicknesses for a printed drawing that took four or five weeks to produce a particular image. Watch one and a half minute video.
"A valve, sort of like an airbrush, where the needle comes down, I can pull the needle up, and lift the whole thing, so that when I lift it it stops the paint and when I drop it, the needle stays up and the paint can flow. Just running it. So here I invented "Chuck Close like.. (My hero is Chuck Close. I love his work.)

"....So here I invented some gestures, diamonds and squares, in different sizes and calculated the amount of the surface of the square, each of those little shapes would cover, and then combined them to make, in this I think there were nineteen different darknesses of line. And then I painted blue and red and yellow and black in sequence over and over. So it painted four times. Just like you imagine, it even makes its own noise: "deeyoo,deeyoo, cheechee, deeyoo, deeyoo, cheechee, deeyoo, deeyoo, cheechee, deeyoo, deeyoo, cheechee!!!" over and over and over and over. So that is very printerly in a way, if we like printing processes where, in this case, four or five weeks, it took to produce one example of prints, ridiculous."
Photos and videos by Robin Gross
Blog layout by Karl Marxhausen

Credits:(POST DIGITAL PRINTMAKING CNC, Traditional and Hybrid Techniques, A&C Black Publishers, an imprint of Bloomsbury Publishing, Plc (pages 119-128), http://mlyon.com/2012/07/post-digital-printmaking/; Chuck Close courtesy of The San Francisco Museum of Modern Art, http://www.tfaoi.com/aa/6aa/6aa176.htm; de-bounce circuit link courtesy of Electroix Express, http://www.elexp.com/t_bounc.htm; actuation link courtesy of Wikipedia, http://en.wikipedia.org/wiki/Linear_actuator; solenoid links courtesy of WiseGeek, http://www.wisegeek.com/what-is-a-solenoid.htm; and Mechtronics; CNC link courtesy of ShopBot, http://www.shopbottools.com/products.htm, December 3, 2012
Websites:
http://mlyon. com/
http://www.ukiyoe-gallery.com/lyon.htm
December 2012